How to connect
Who can use HYPATIA-Compute?What is the ELIXIR AAI?
How do I create an ELIXIR AAI account?
How do I login to HYPATIA-Compute using my newly created ELIXIR AAI account?
What data do you keep in the HYPATIA database regarding my ELIXIR AAI Account?
What happens if I forget my password?
HYPATIA-Compute
What is HYPATIA-Compute?What are containers?
What do I need to use HYPATIA-Compute?
I have multiple active on-demand batch computation projects, how do I select the one I want to use?
How do I upload, manage and download input/output files?
How do I download files based on public repositories (Helix and Zenodo) or a URL?
How do I upload a dataset on Zenodo?
How can I find a catalog of the software that has already been uploaded to the system?
How do I upload a containerized software to the system?
How do I create the CWL description required for software upload?
How do I edit my software?
How do I delete my software?
How do I run my software?
How can I find a catalog of the workflows that have already been uploaded to the system?
How should a CWL workflow be developed in order to be executed on HYPATIA-Compute?
How do I upload a workflow?
How do I edit my workflow?
How do I delete a workflow?
How do I upload an example for my software/workflow?
How do I run a CWL workflow?
How do I view the history of the software/workflow runs I have performed?
How can I view information about a job run?
Can I download the stdout logs of a completed job run?
How do I re-attach a job/workflow session for a job running in the background?
How do I re-run a completed/canceled job (software/workflow)?
How do I create an RO-crate (completed jobs)?
How can I edit/recreate an RO-crate?
How can I view/download RO-crates created by other users?
How do I view/manage my Jupyter Lab servers?
How do I start a Jupyter Lab server?
How do I stop a Jupyter Lab server?
How do I access a Jupyter Lab server?
How to connect
Who can use HYPATIA-Compute?
Anyone having an active ELIXIR AAI account can log in to HYPATIA-Compute. For details about what an ELIXIR AAI account is and how to get one, see below.Back to top
What is the ELIXIR AAI?
The ELIXIR Authentication and Authorisation Infrastructure (AAI) is a Single Sign-On (SSO) service that enables researchers to use their home organization credentials or community or commercial identities (e.g. ORCID, LinkedIn) to sign in and access data and services they need. It also allows service providers (both in academia and industry) to control and manage the access rights of their users and create different access levels for research groups or international projects. This facilitates easy access to ELIXIR services and resources for researchers, by removing the need to remember different passwords for each service and instead using their institutional credentials to sign in via their home institution.Back to top
How do I create an ELIXIR AAI account?

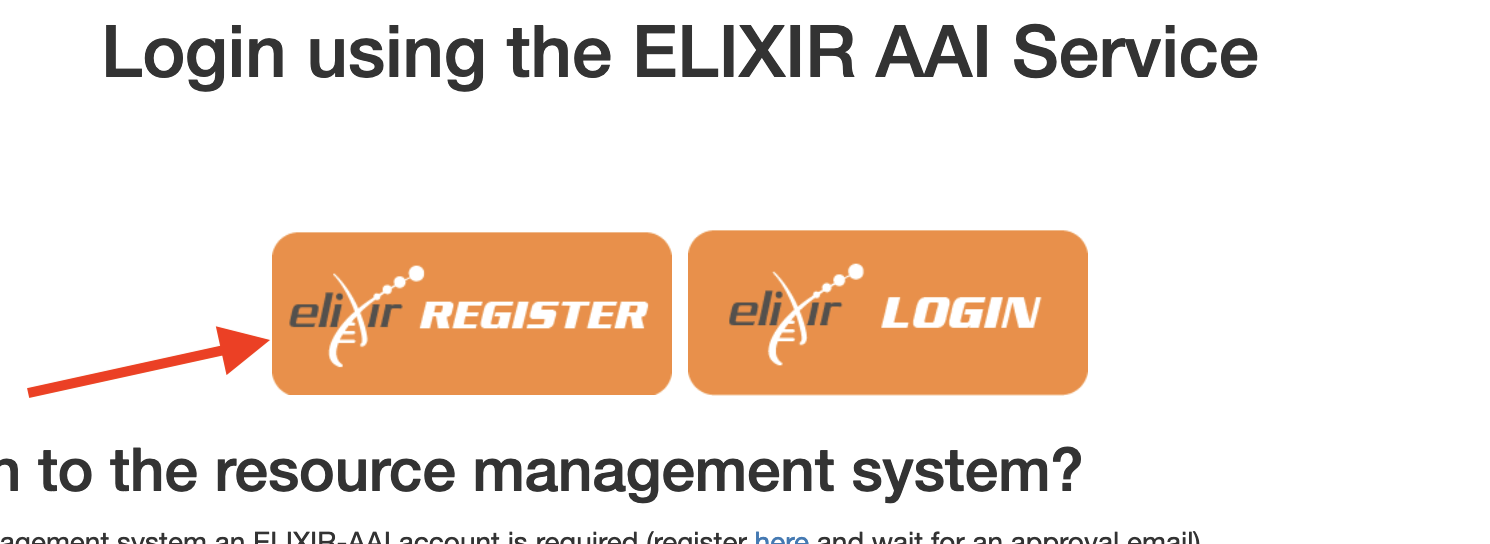
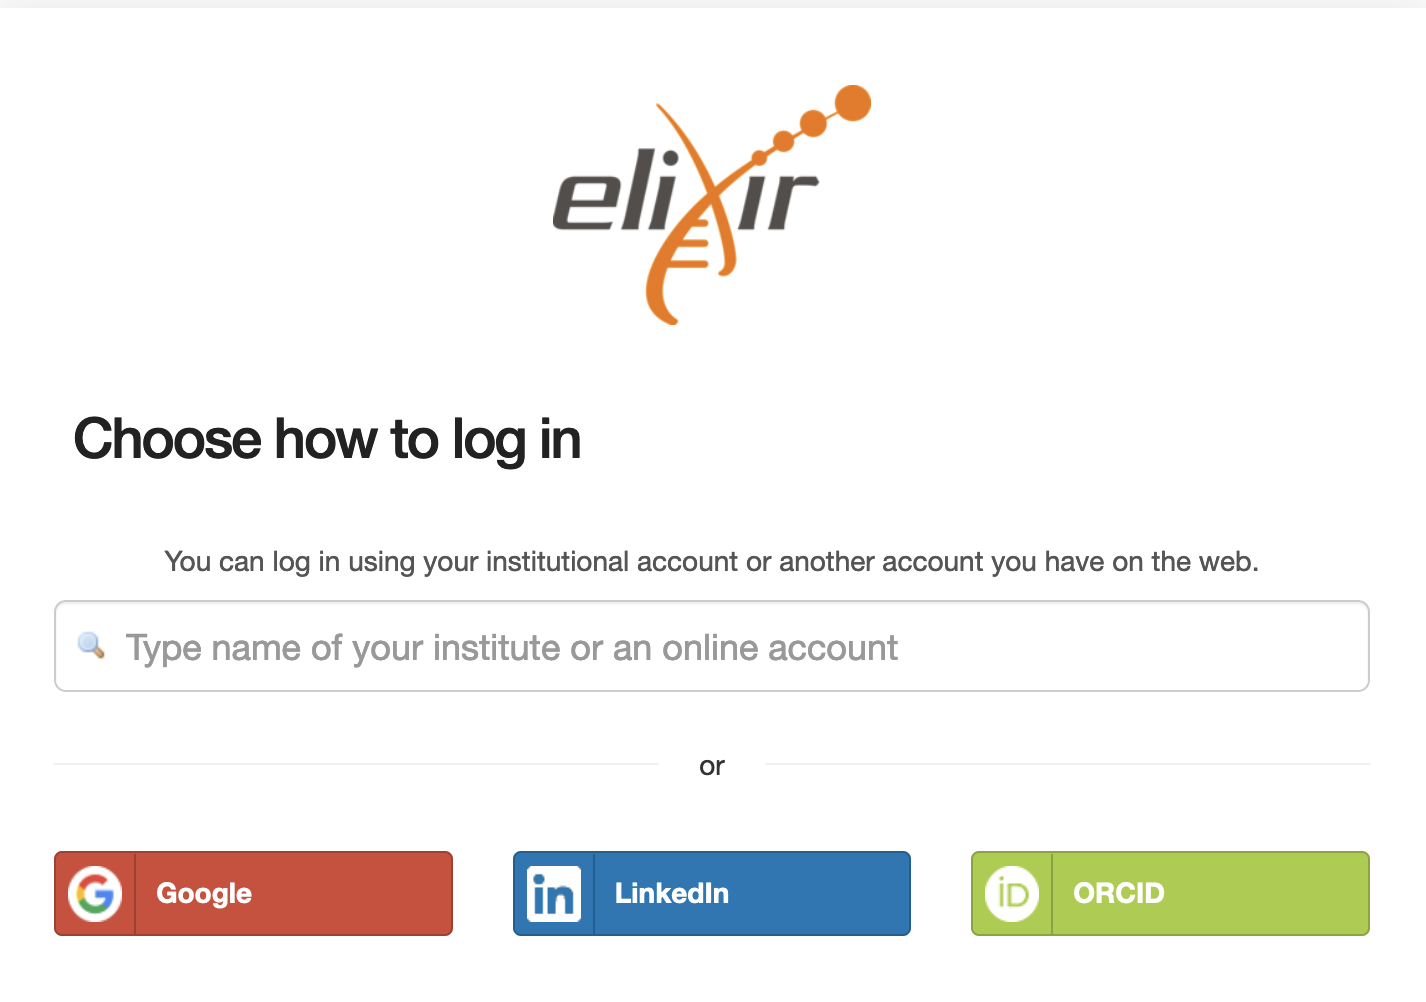
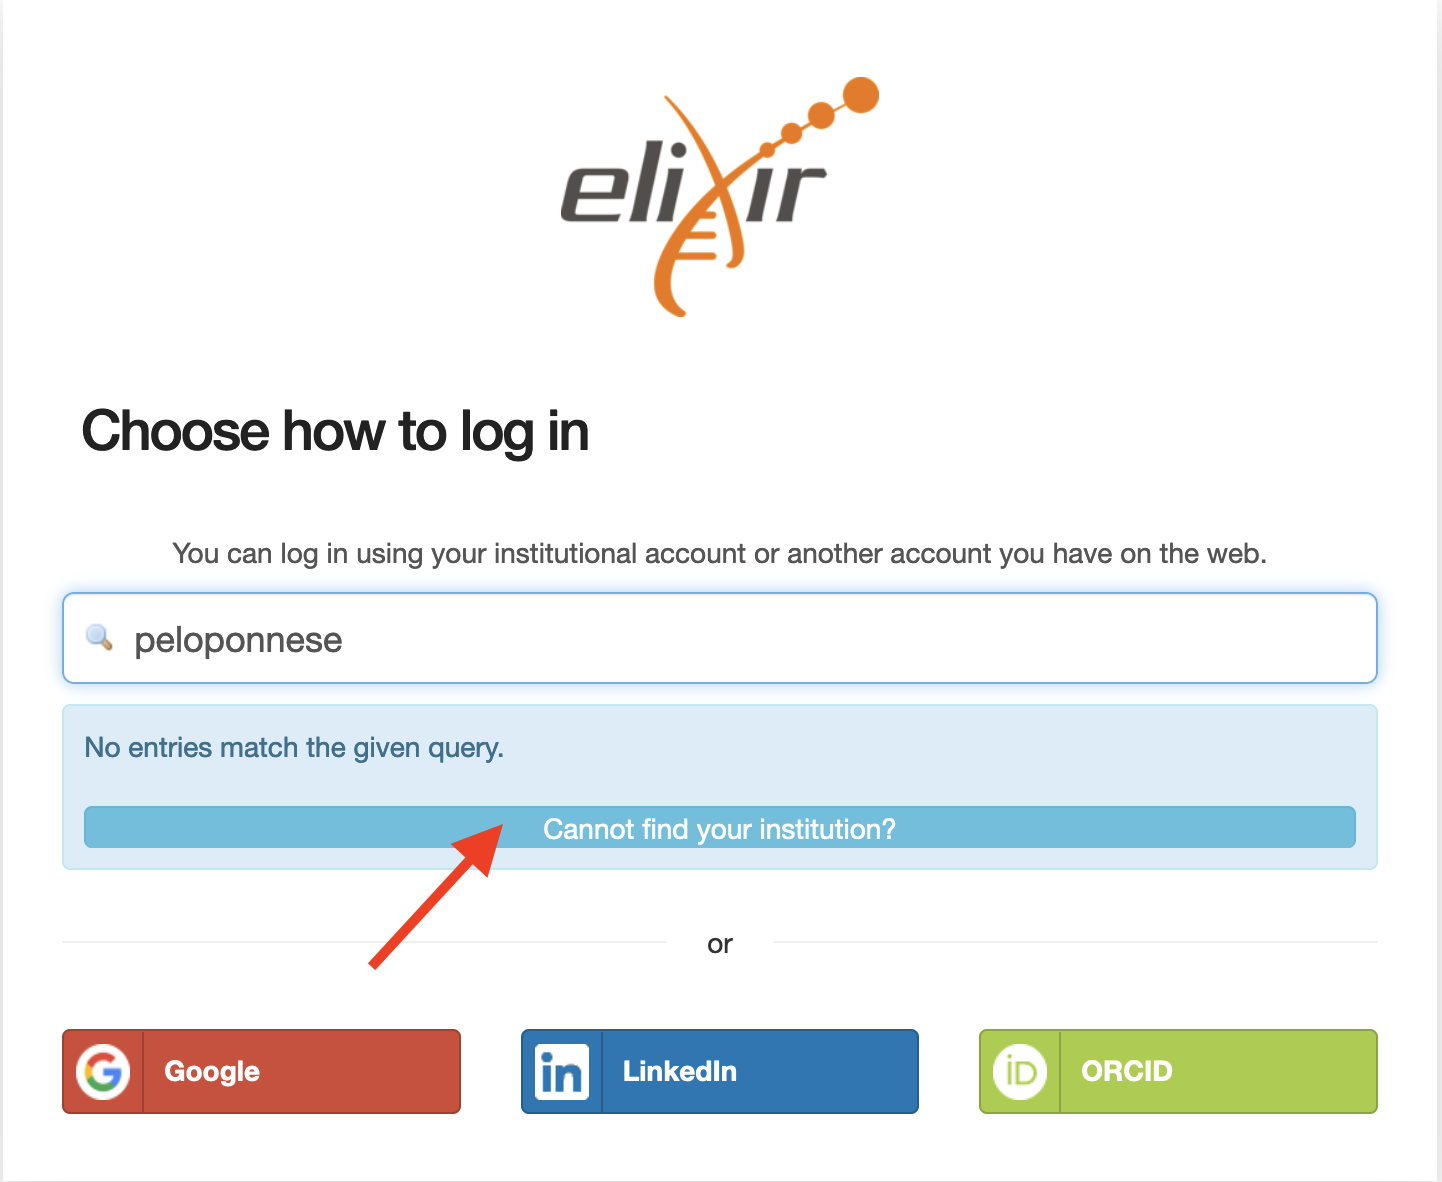
Back to top
How do I login to HYPATIA-Compute using my newly created ELIXIR AAI account?
You need to follow the same procedure as registering, but instead of pressing the “REGISTER”, you press the “LOGIN” button: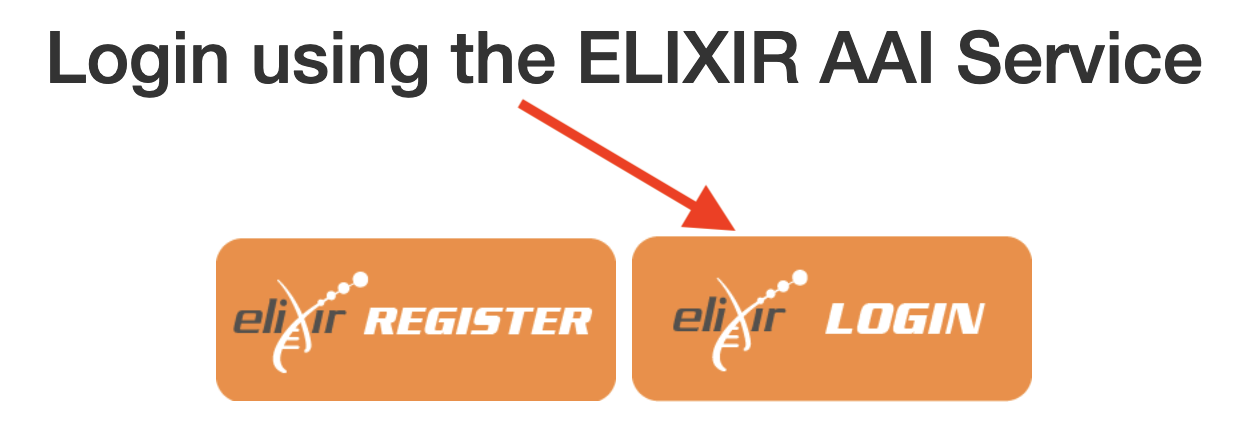

Back to top
What data do you keep in the HYPATIA database regarding my ELIXIR AAI Account?
In accordance with our Privacy policy, the only information stored in our database is your ELIXIR AAI username that you selected when you created your account, which is necessary for authentication purposes required by the HYPATIA website. The data are not shared with any third party and you reserve your right to ask for their deletion at any time, in accordance with the GDPR. No other sensitive information regarding your e-mail, institution or other personal information is retrieved from the service.Back to top
What happens if I forget my password?
Since we use a Single Sign-On service (SSO) your password is not stored by HYPATIA, but rather by your institution or the service that you use to login to the ELIXIR AAI, you need to follow the appropriate procedures of the respective organization to reset your password.Back to top
HYPATIA-Compute
What is HYPATIA-Compute?
HYPATIA-Compute is the platform created and maintained by the Greek Node of ELIXIR that facilitates execution of containerized software and distributed workflows based on containers. HYPATIA-COMPUTE uses Kubernetes, an open-source platform that is used to orchestrate containers across a large cluster of physical servers. Moreover it facilitates experiment reproducibility by allowing users to create RO-Crate objects based on executions they have performed in the past.Back to top
What are containers
Containers are ephemeral virtual machines, that are created on the fly, based on a docker image, to execute a task and are then destroyed. More information on containers can be found in the Docker documentationBack to top
What are containers
Containers are ephemeral virtual machines, that are created on the fly, based on a docker image, to execute a task and are then destroyed. More information on containers can be found in the Docker documentation.Back to top
What do I need to use HYPATIA-Compute
You will need an active HYPATIA On-demand batch computations project. If a project is not available, you will not be able to execute any software or workflow; however you will still be able to manage your files/folders and create RO-Crate objects.Back to top
I have multiple active on-demand batch computation projects, how do I select the one I want to use?
At the top right part of the HYPATIA COMPUTE platform you can find the following box: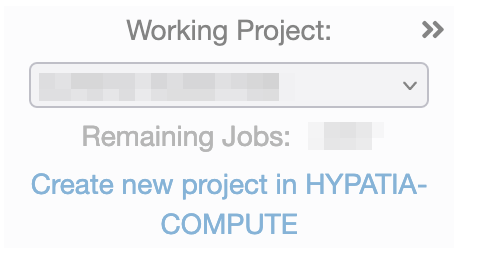
Back to top
How do I upload, manage and download input/output files?
Click on the “Data” tab of the top navigation bar and the following page will appear: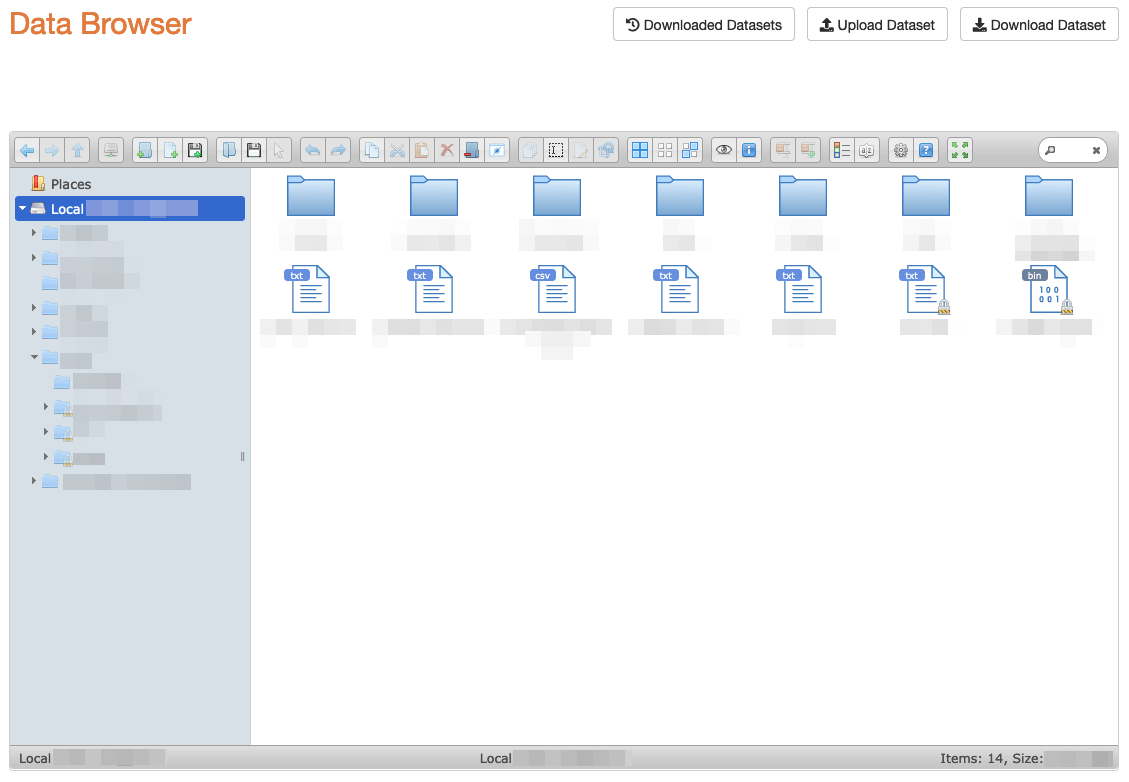
Back to top
How do I download files based on public repositories (Helix and Zenodo) or a URL?
Press on the Download Dataset button on the Data Browser page and the following page will open: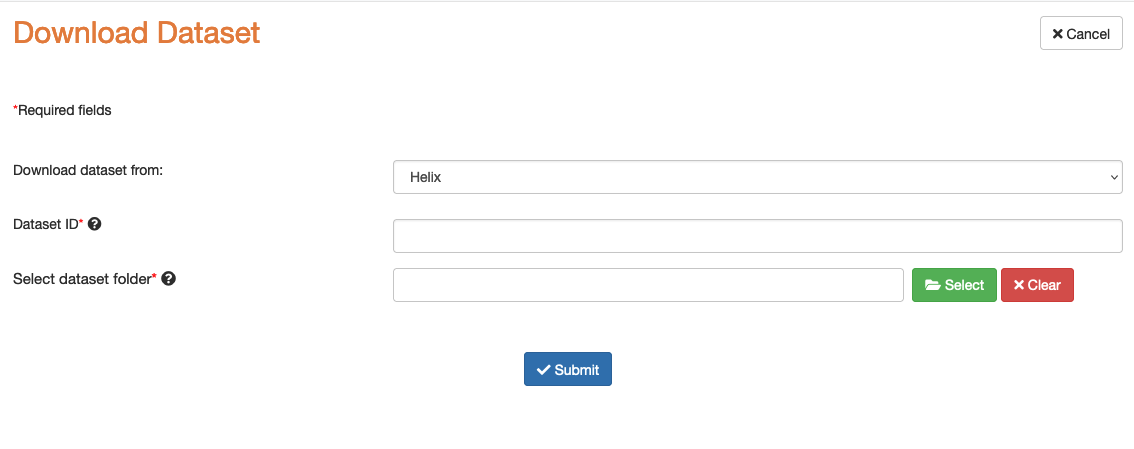
- Download dataset from: you can select between Helix, Zenodo and Any URL
- Dataset ID/URL: ID of the dataset you would like to download (for Helix and Zenodo) and URL (for Any URL)
- Select dataset folder: select the system folder where you would like to download the dataset
Back to top
How do I upload a dataset on Zenodo?
Press on the Upload dataset button on the Data Browser page and the following page will open: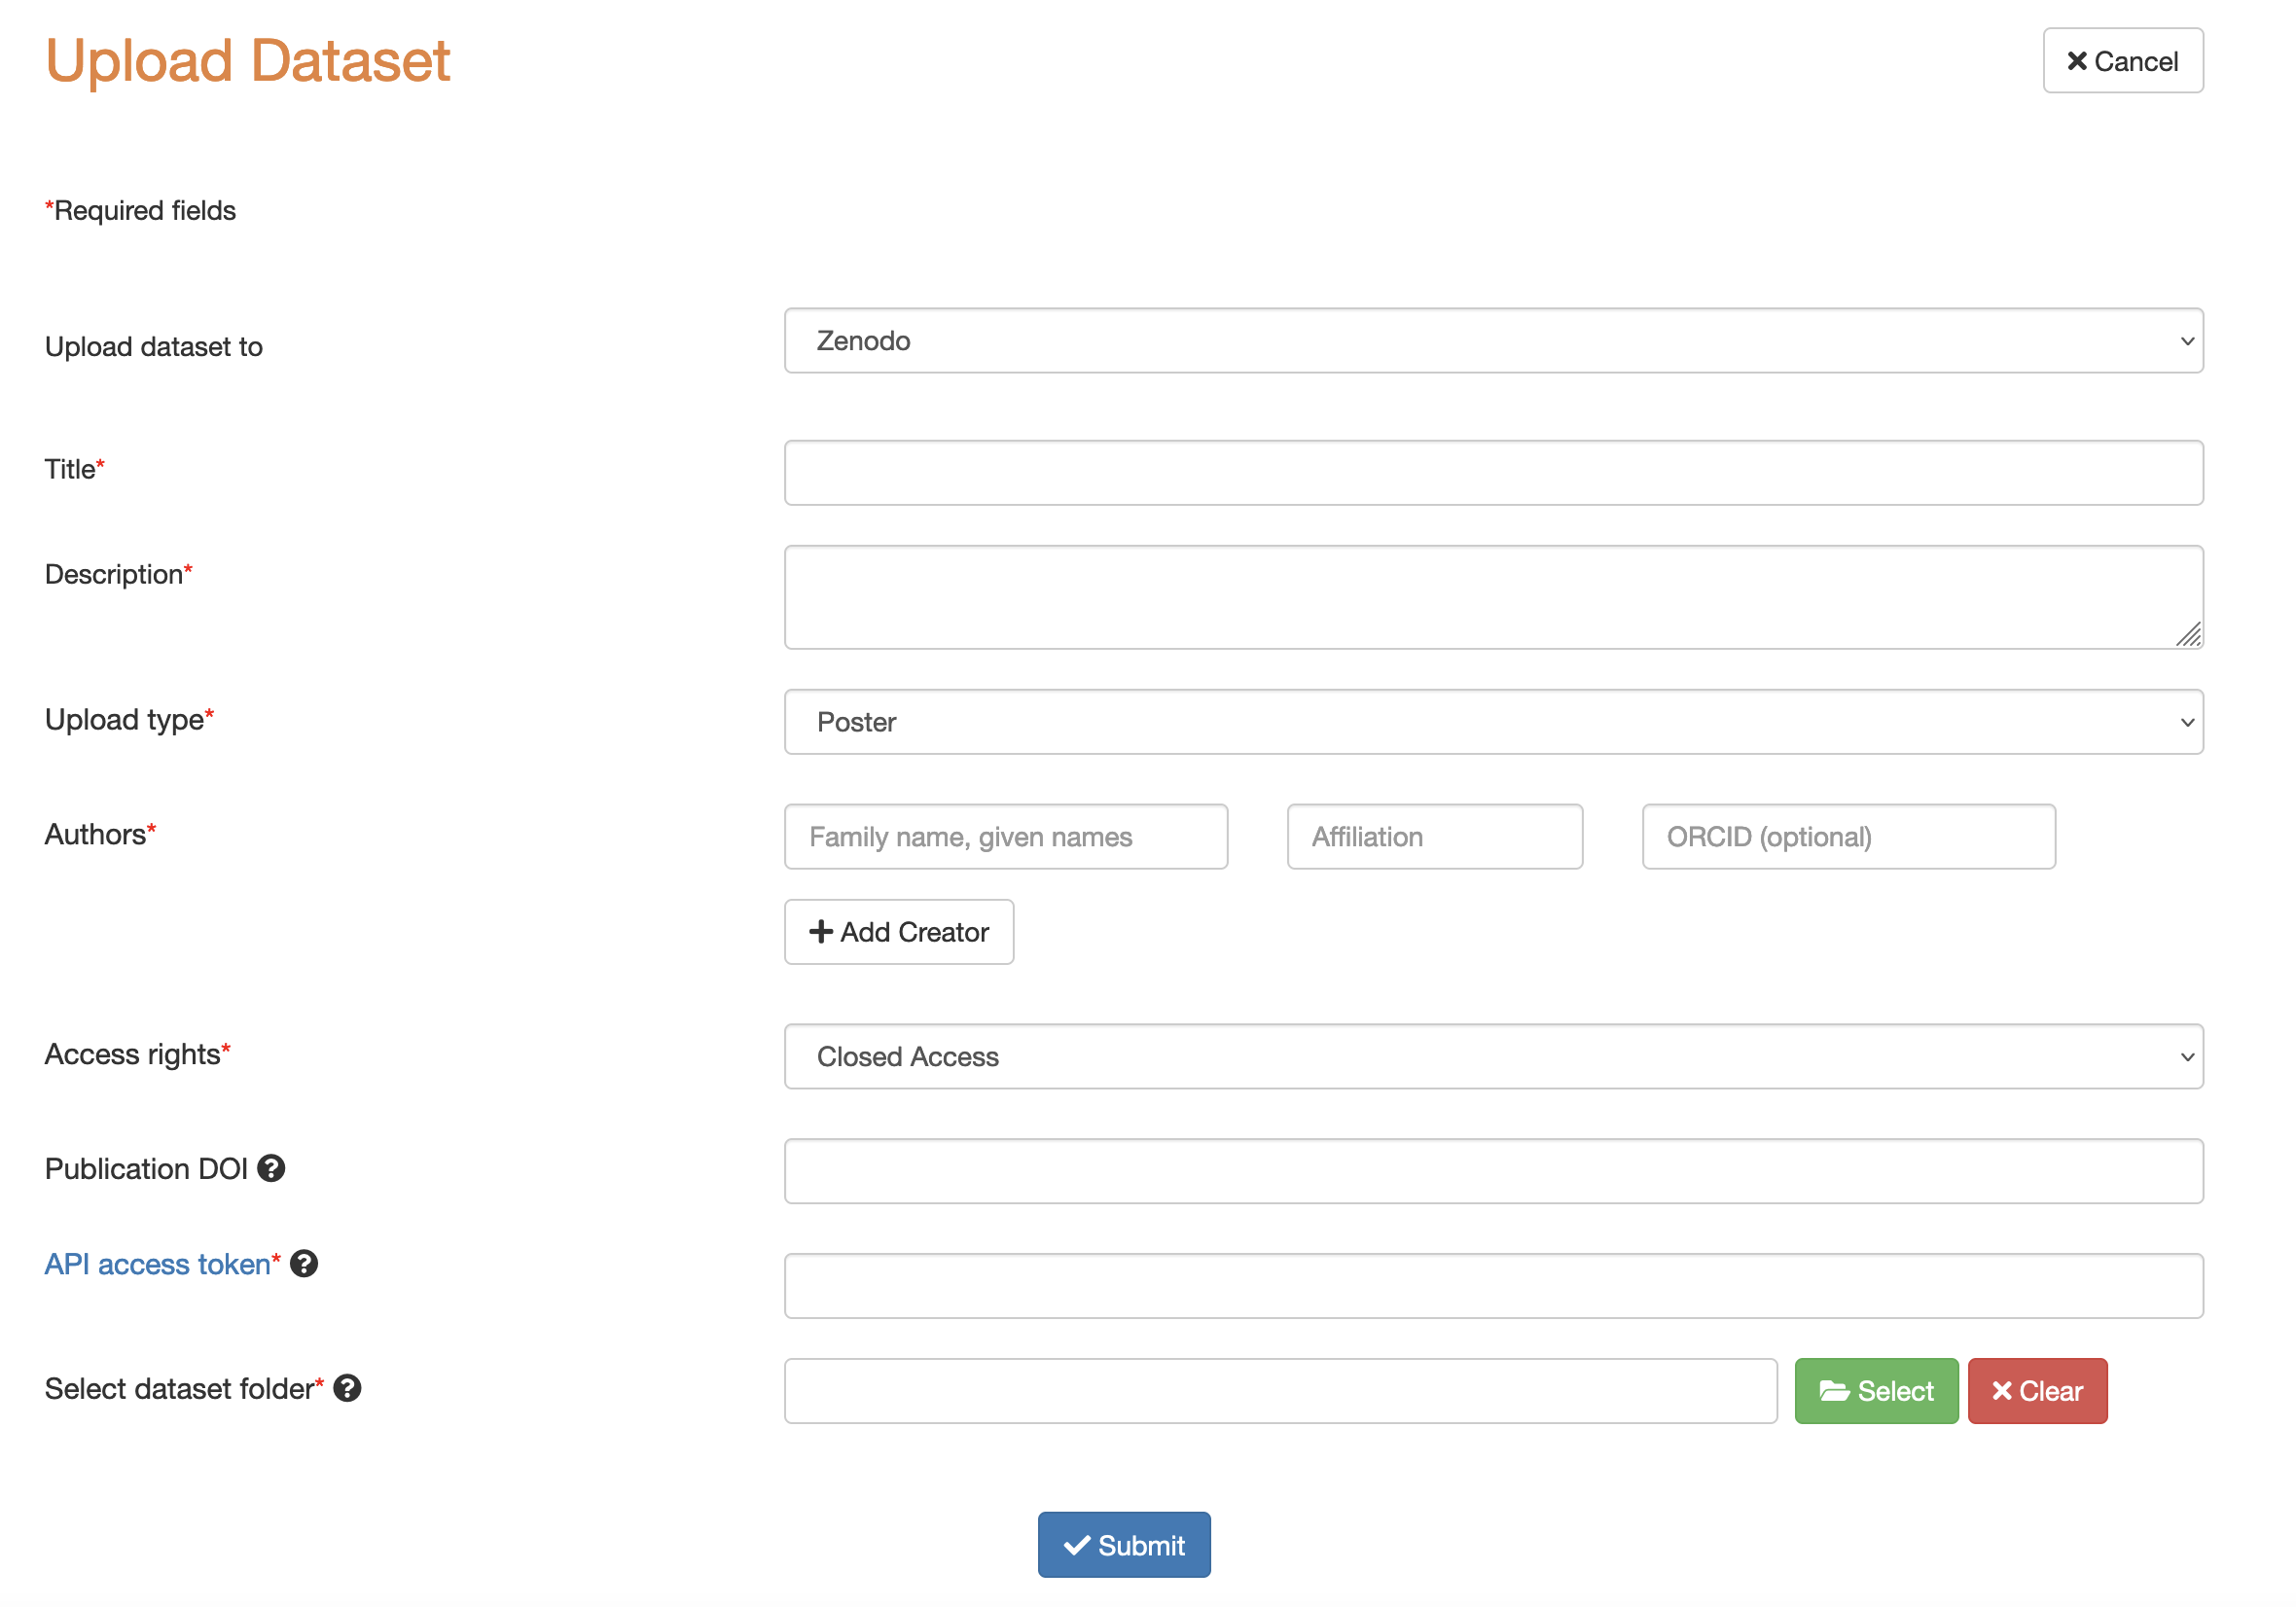
Back to top
How can I find a catalog of the software that has already been uploaded to the system?
The software catalog can be found by pressing the “Software” tab on the top navigation bar:
- Visibility: whether the software is available to all users or only to you.
- Name: name of the software as it appears in the system.
- Version: you can select one of the versions of the software available to the system.
- Description: by clicking the question mark, a pop-up containing a short description of the software will appear.
- Image: the image name and whether it is located in a public repository (dockerHub) or in our private repository (localImage).
- Uploader username: the user that uploaded the software.
- Run (visible only when there is an active project): run a software.
- Edit: edit a software, which you have uploaded.
- Delete: delete a software, which you have uploaded.
Back to top
How do I upload a containerized software to the system?
Press the “New image” button on the “Software” tab and in the page that is loaded, please fill out the following information:- Software name: the name of the software after upload to HYPATIA.
- Software version: the version of the software after upload to HYPATIA.
- Description: a short description of what the software does.
- Visible to: choose whether the software should be visible only to you (and system administrators) or all users.
- Input folder mountpoint: the location inside the container, where a system folder containing the input will be mounted.
- Output folder mountpoint: the location inside the container, where a system folder will be mounted for the output.
- Software uses GPUs: if your software is based on execution on a GPU, please check this box, so that execution will be performed on a GPU machine.
- Link in bio.tools: if the software has been uploaded to bio.tools, then please provide a link here.
- Relevant DOIs: if the software is associated with a DOI, then please, provide it here.
- Upload CWL definition: upload a .cwl or .yaml file containing the CWL CommandLineTool definition of the software (check next question on how to create the file).
- Upload image tar.gz: in case the image has not been uploaded to a public registry and it is not publicly available, then you can upload a .tar.gz file containing the image. In case it is publicly available, please use the .cwl file to specify the image.
- User instructions: add instructions to assist users with the execution of the software.
Back to top
How do I create the CWL description required for software upload?
On the software catalog page, select the appropriate name and version of the software and press the edit button. On the page that loads, change the appropriate information and press submit. You can also download the previous CWL description and upload a new CWL description file.Back to top
How do I edit my software?
You can either follow the example on HYPATIA or look for more information in the CWL documentation.Back to top
How do I delete my software?
On the software catalog page, select the appropriate name and version of the software and press the delete button. A pop-up will open asking the user for permission to delete the software.Back to top
How do I run my software?
On the Software catalog page (“Software” tab) select the appropriate name and version of the software and press the run button and the following form will appear: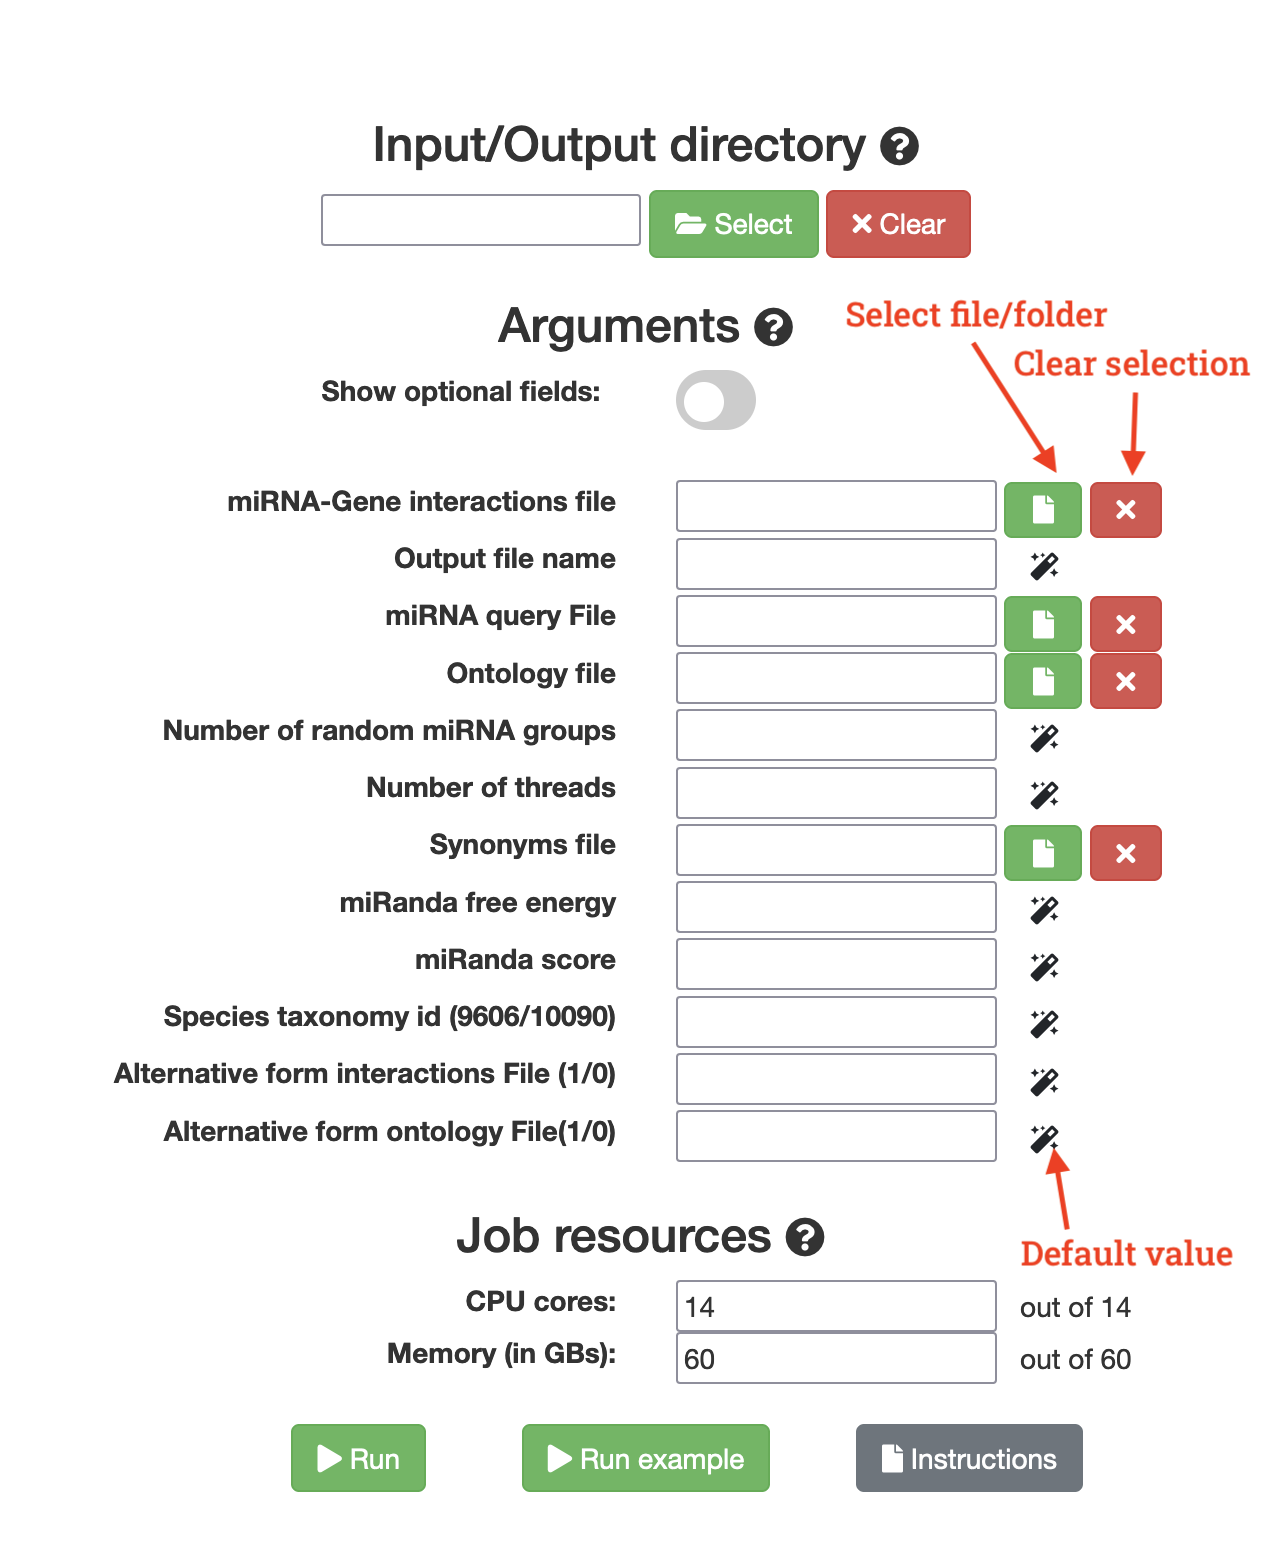
- Input/Output directory: a local folder that will be mounted to a location in the container, which was specified by the software uploader. In case the Input and Output locations are different, two fields appear. after clicking the “Select” button appears, showing you the folders that exist in the system so that you can select one.
- Arguments form: the form contains the arguments used for running the software and it is created based on the CWL tool description provided by the user. Depending on the type of input, the form has a different behaviour:
- Files/Folders: The select button allows you to choose a local file (inside the Input/Output directory) from a pop-up. The clear button clears the value in the field.
- Integers/strings: you have to enter a value or use the default value button if a default value exists in the CWL description.
- Integer/String array fields: The select button opens a pop-up that allows you to enter values for each element in the array. The clear button clears the values in the field.
- Boolean fields: Used to specify whether a flag specified in the CWL description will be used. The appear as checkboxes.
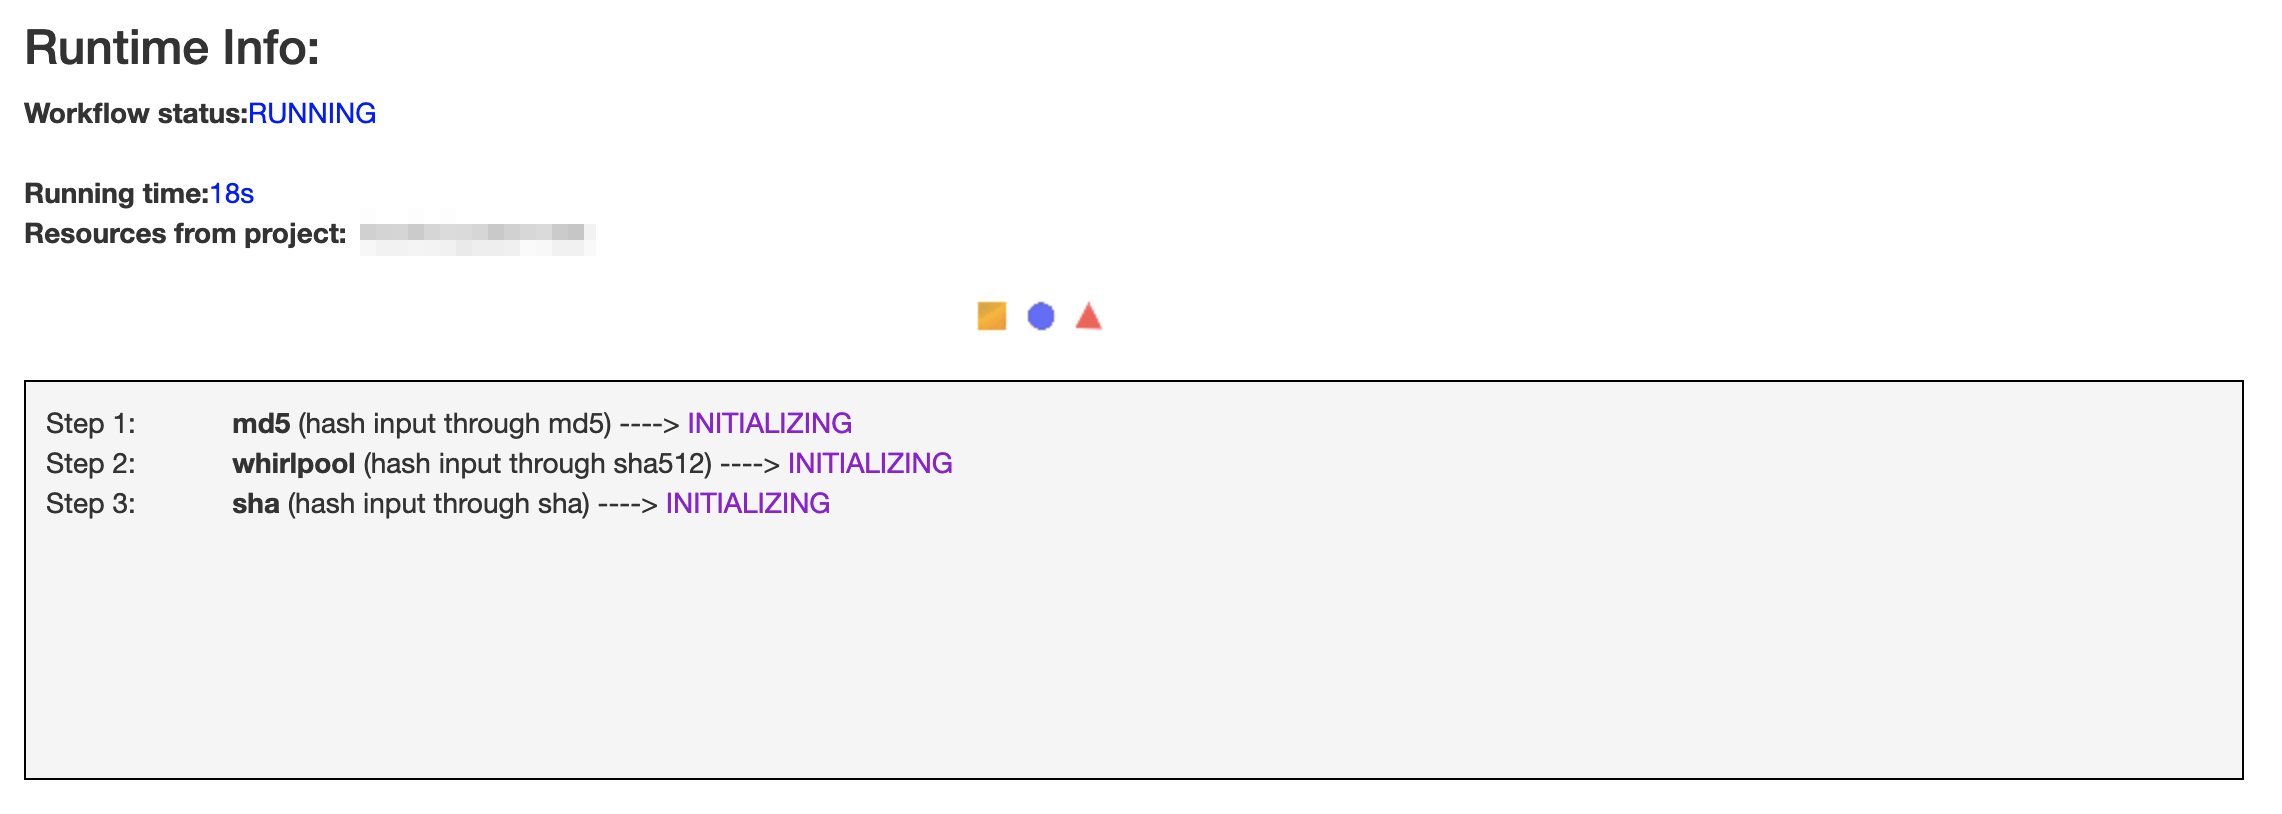
- Run button: The Run button starts the execution of the software, using the specified arguments and the following page appears, that shows information about the execution:
The page contains the status and running time of the container, as well as the stdout of the container. At any point in time, you can close the window or navigate away from the run page; the execution of the software will be continued in the background.

- Run example button: If the uploader of the software has uploaded example arguments, then the button will be active and you will be able to use the example provided. If you are the uploader of the software and you would like to add an example, see the appropriate question.
- Instructions button: shows a pop-up that contains instructions provided by the uploader.
- Cancel button: after the execution has commenced, you can cancel it at any time. Jobs that are canceled before 60 seconds will not be subtracted from the number of available jobs for a given project.
Back to top
How can I find a catalog of the workflows that have already been uploaded to the system?
The workflow catalog can be found by pressing the “Workflows” tab on the top navigation bar and is similar to the one for software catalog:
Back to top
How should a CWL workflow be developed in order to be executed on HYPATIA COMPUTE?
Your workflow should be able to run in a distributed environment. This means that each step should be able to run using a Docker image. For this reason, each step should have an appropriate dockerRequirement specification. Moreover you should create a .zip file containing the workflow files in a structure similar to the one used when running locally using cwl-runner (cwltool).Back to top
How do I upload a workflow?
Press the “New workflow” button on the “Workflows” tab and in the page that is loaded, please fill out the following information.- Workflow name: the name of the workflow after upload to HYPATIA.
- Workflow version: the version of the workflow after upload to HYPATIA.
- Description: a short description of what the workflow does.
- User instructions: add instructions to assist users with the execution of the workflow.
- Visible to: choose whether the workflow should be visible only to you (and system administrators) or all users.
- Link in bio.tools: if the workflow has been uploaded to bio.tools, then please provide a link here.
- Relevant DOIs: if the workflow is associated with a DOI, then please, provide it here.
- Upload CWL definition: .zip file containing the workflow files.
Back to top
How do I edit my workflow?
On the workflow catalog page, select the appropriate name and version of the software and press the edit button. On the page that loads, change the appropriate information and press submit.Back to top
How do I delete a workflow?
On the workflow catalog page, select the appropriate name and version of the software and press the delete button. A pop-up will open asking the user for permission to delete the software.Back to top
How do I upload an example for my software/workflow?
If you are the uploader of the software/workflow, you will find a link to upload an example under the “Run example” button on the respective run page:
Back to top
How do I run my software?
On the workflow catalog page (“workflow” tab) select the appropriate name and version of the workflow and press the run button and the following form will appear: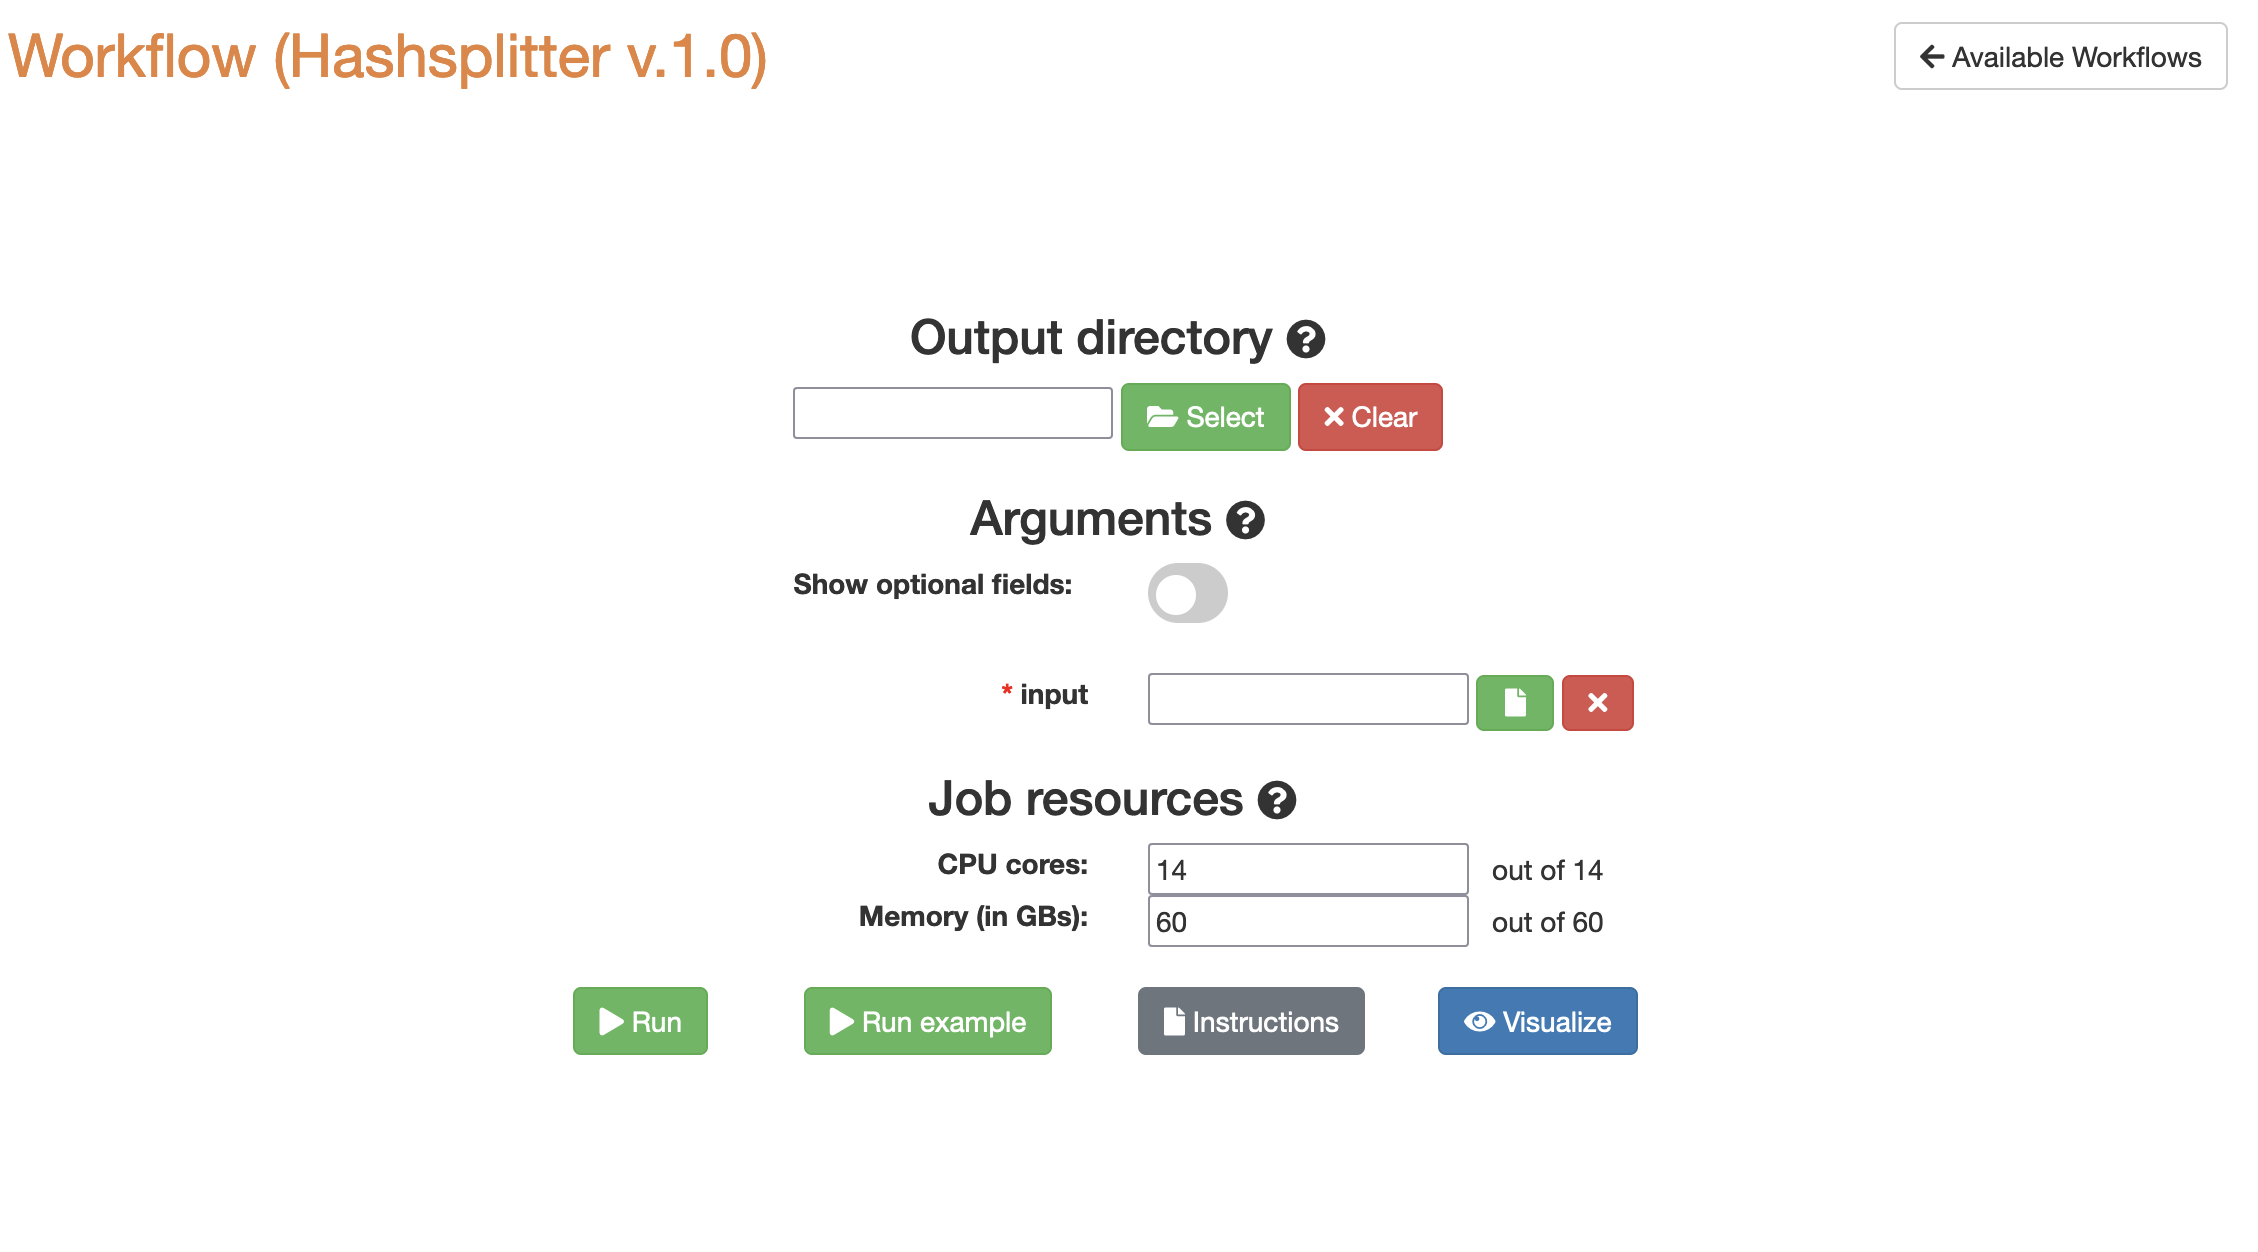
- Output directory: he local directory where you would like to place the output of the workflow, after execution is finished.
- Arguments form: field types are the same as the ones for software.
- Run/Run experiment/Instructions buttons: these buttons have the same function as the one for software.
- Visualize workflow: identical function as the one on the workflow catalog page.
Back to top
How do I view the history of the software/workflow runs I have performed?
Press the “Job history” tab from the top navigation bar and the following page will load:
- User statistics: view information about the user’s use of HYPATIA COMPUTE.
- Re-attach button (for jobs that have a running status): re-attach the job run session.
- Re-run button (for jobs that have a complete/canceled/error status): reload the form with the arguments of the previous run.
- View details button: check more details about the job run.
- Create RO-crate: create an RO-crate using information from the job run.
Back to top
How can I view information about a job run?
Press the job details button on the “Job history” page and the following page will load: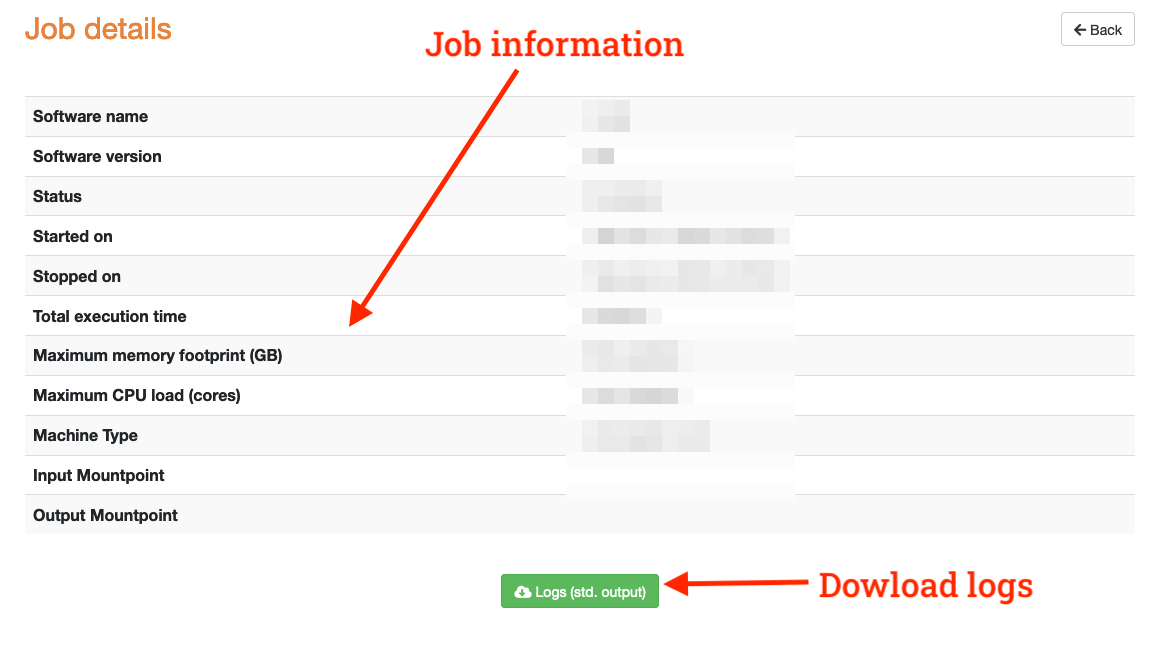
Back to top
Can I download the stdout logs of a completed job run?
Press the download logs button on the job details page.Back to top
How do I re-attach a job/workflow session for a job running in the background?
Press the re-attach button for this job on the “Job history” page (see relevant question).Back to top
How do I re-run a completed/canceled job (software/workflow)?
Press the re-run button for this job on the “Job history” page (see relevant question).Back to top
How do I create an RO-crate (completed jobs)
Press the RO-crate button for the job on the “Job history” page and a similar page will pop-up: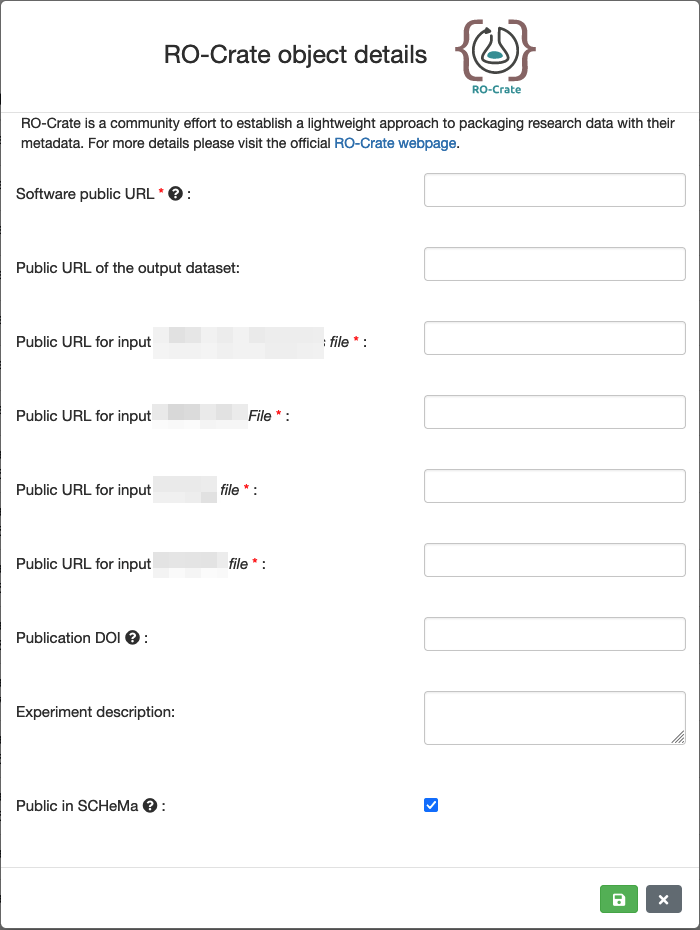
Back to top
How can I edit/recreate an RO-crate?
Press the “RO-crate create” button on the Job history page and a window similar to the original creation window will pop-up. This window allows you to change the RO-crate values or download the previous RO-crate.Back to top
How can I view/download RO-crates created by other users?
Press the “RO-crates” tab on the top navigation bar and the following page will load: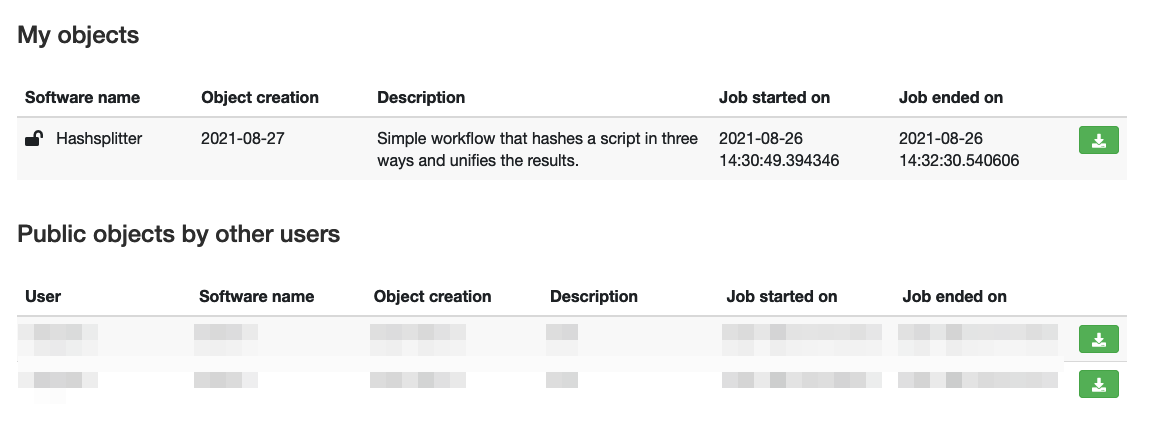
Back to top
How do I view/manage my Jupyter Lab servers?
Press the “Jupyter” tab on the top navigation bar and the following page will load:
Back to top
How do I start a Jupyter Lab server?
Choose the project with which you would like to create a Jupyter Lab server and press the start button. The following page will load:
Back to top
How do I stop a Jupyter Lab server?
Choose one of the active servers and press the stop button.Back to top
How do I access a Jupyter Lab server?
Choose one of the active servers and press the access button. Your server will open in a new browser tab/window and you will need to enter the password during the start process in order to access the server.Back to top